Saturday, 28 April 2012

StuGs and escorts

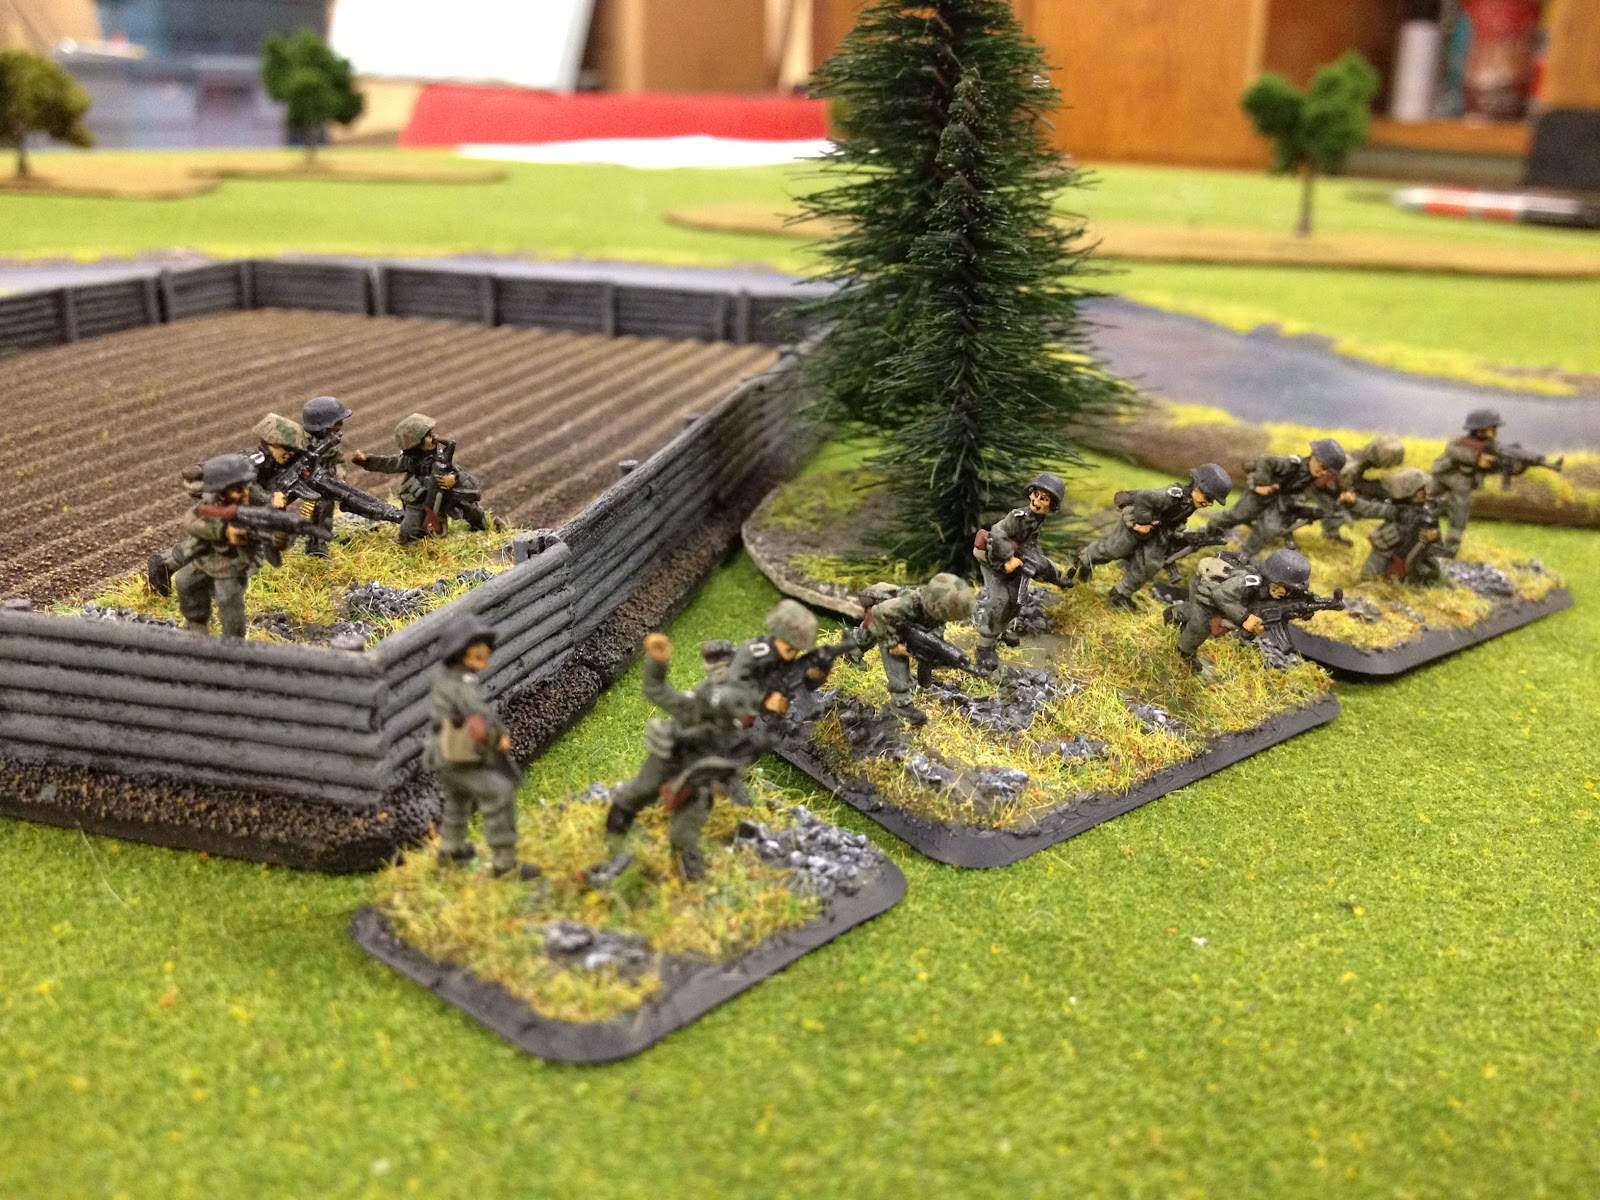
I recently got my hands on a blister of German tank riders.  Planning on running a platoon for support with my Fallschirmjager from Grey Wolf.
Heres some pics of them all done up.  I used my usual splinter camo for the smocks and helmet covers.
I put 3 escort riders on each assault gun.  And I opted to glue them down permanently.   I fiddled with trying to cut clear plastic but gave up.  There was just so much stuff in the way and it still tended to slide off.  That and the plastic is very shiny and noticeable.
I then tried "Blue tac"  And it just wasnt strong enough.  Plus no matter how little I placed under the men it still squished out around them and was visible.
I have other StuGs without riders that I can use when I dont pay for the upgrade so gluing these guys down seemed like the best option.  I also have the dismounted teams I am just finishing up with the basing.  Not sure what Ill use them for yet as they are only 3 teams plus a command stand.  Any ideas?
EDIT:  Added pics of the dismounted guys.


Thanks for looking

Rob

Sunday, 22 April 2012

Crash Action!

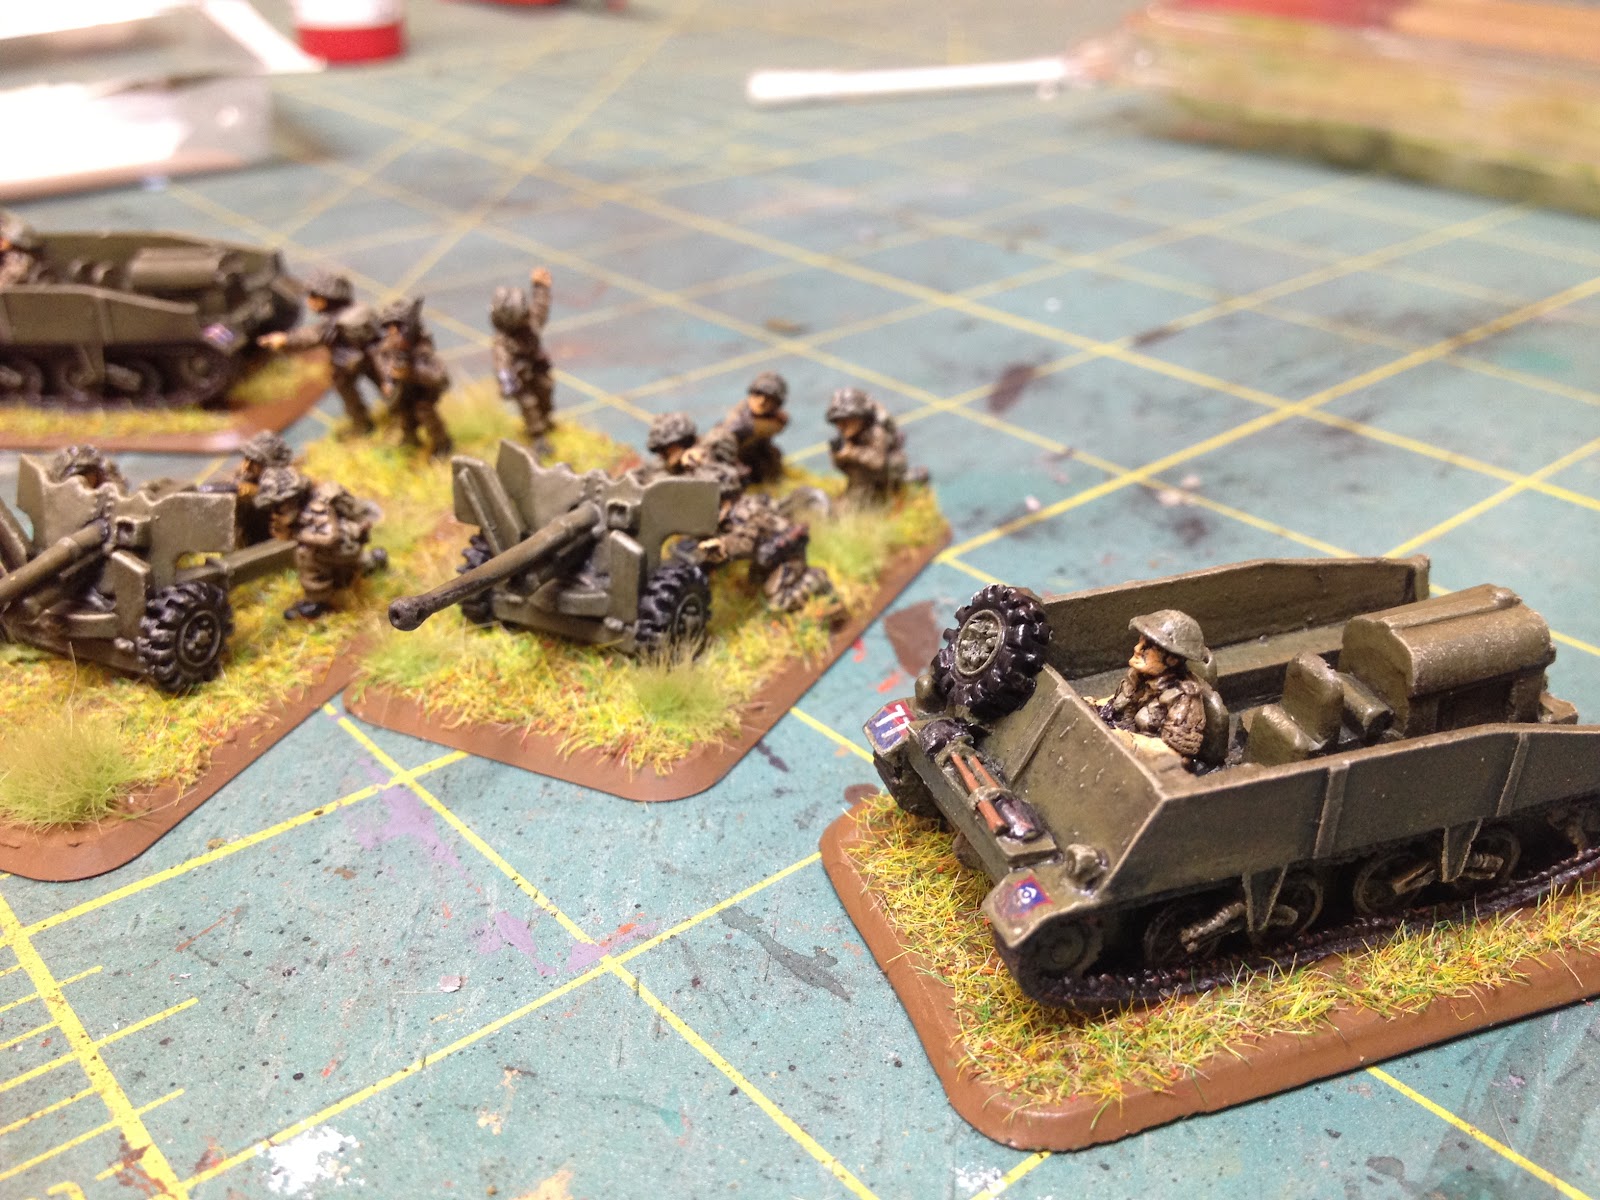
So with V3 transports are now very effective if used wisely.  So I figured our British Artillery teams could benefit from some mobility.  Here is enough trucks to move a whole  4 gun battery of 25 pounders.  Cant wait to see "Crash Action" at work.  (Page 49 of the V3 Rules)


Decals are from "Doms Decals"  Love them.  He lists on the decal sheet what each decal is for.  So I knew that the yellow circle with the 5 represents the 15cwt trucks for example.  Doms decals are definetely worth checking out.  You just have to remember that you need to cut out each decal individually.  Not a big deal.  :)
DOMS

Friday, 13 April 2012

Finished Typhoons

This is directly related to a post over on one my favorite Blogs Breakthrough Assault .  These are some pics of my wife's Typhoons that we did up for her Irish Guards force from Hells Highway.  We wanted to make sure the Invasion stripes were done as best as possible so my wife had the brilliant Idea of using Auto pin striping.  It was easily bought at our local Canadian Tire store.  And I'm sure any auto body or parts store would sell it.

It comes in varying thicknesses.  The stuff we used is 1/8' wide.


 Everything else was hand painted.  I might also strongly recommend planning the camo scheme before painting it by drawing it on lightly with a pencil first.
The Flames of war site has a tutorial I tried to follow as well.  (Minus the invasion stripes)

Happy Skies!

Tuesday, 3 April 2012

Tigers

Last weekend our local game shop held an April fools themed event.  The just of it was that anyone who wanted to join in had to bring a 1500 point company.  And for every Company fielded the store owner would field half the amount in points of his own forces to go up against us all.

The catch being that all the store owners forces would be in Ambush!  The game was alot of fun. It was unpridictable and fast paced.  The winner was determined by who on the attacking team could get farthest down the table lol.

Anyway I wanted to field a Bake Panther company with a Tiger platoon so I had to paint up my tigers that had been sitting in the Q for months as fast as I could!

I didnt finish them in time but they were all base coated and camouflaged so I used them anyways.  :)
Here they are just base coated ready for camo.  I used the Battlefront armor late war german spray.
 Here they are with Camo airbrushed.
 Colors used.  I mix just a little bit of the Rubbing alcohol into the paint.
Next I painted all the tracks using gunmetal grey.   Then it was time to spray a heavy coat of varnish in preparation for decals.
The decals were a real pain.  And I had to give up on placing the numbers on the turret sides for 3 out of 5 of these.  I dont know if it was a bad batch of decals or if the Force just wasnt with me this time, because I couldnt get them to stick.  I used plenty of decal softener as well.  But still no luck.  The last picture is after decals and a heavy black wash.
Im headed out to the garage now to do the drybrushing and details.  Even with the decal debacle these Cats are still turning out fine.......

Well I might as well carry on and add more as I go.   Did a rust wash on the tracks using watered down Rust pigment.  And then proceeded to drybrush the entire tank using 70% Middlestone and 30% buff mix.

Next Ill be painting all the details and adding dust and soot using pigments.  Then crew and Matte Varnish.  Ok the platoon is 100% done.
Im pretty happy with the result.  However I did change one thing compared to how I did all my other AFVs.  normally I use a 50/50 mixture of Middlestone/White to do the final drybrushing.  This time I switched to Middlestone/Buff.   I think this gave an overall more Yellow finish which I dont like as much as the "bleached or weathered look the white gives.  
They still turned out great.  I think I just prefer the other result more.


Thanks for following along.

Rob

Monday, 19 March 2012

6 pounders are finally done.

Sorry for the lack of progress folks.  I did manage to get into the garage and finish up these AT Guns though.  :)
I scored the bases with a knife before glueing the fully painted figs down and then covered the bases up to the height of the figures feet with drywall spackle.
I let the spackle dry overnight.  Then painted it all Flat Earth.  I kept things basic and didn't do any further detailing on these so that they would fit in with the other 4 guns that are already in the collection.
 Once the flat earth dried it was just a matte of mixing up some white glue/water and sprinkling on the static grass.   I also added some silfor tufts.

Im especially happy with the detail and finish of the troops.

Next up is a US Armored Recon platoon!  :)

*Update*
Figured out how to edit posts :)   Here is a picture of the Didis magic wash and Flow Aid I use for the washing  of all my armored vehicles.
 Heres a link to the site although I bought mine at Michaels here in Canada. http://www.liquitex.com/flowaid/
 And here is my next project.  The Armored US Recon.  I assembled them and applied a spray coat of black and then the US armor paint from battlefront SP03.  Ill continue this in a new post.  :)

Tuesday, 6 March 2012

Finished AVRE and progress on 6 pdrs.

I managed to finish up the 2 AVRE Churchills and one MK VI variant.  Ill pick up where I left off.
Once the varnish dried I was able to apply the decals.  Varnishing helps to smooth the surface out and goes along way to eliminating the tiny pits, scratches and imperfections that water can sit in behind your decal.  The effect of which we call "silvering"  I tend to use Matte spray varnish but I know Gloss is even better.  You go over the whole mini at the very end with a final matte coat which will get rid of the gloss effect once your all done.

I used a combo of BF british decals and some I special ordered from Dom's.  I will be reviewing the Dom's decals in a later post.
I refrenced the british tank markings chapter in Turning tide and also the article British tank markings in Normandy on the FoW site.  From what I could tell the AVREs where apart of the 79th AD.  But were attached out to support various other units at the D-Day Landings.
The Loyd carriers for the 6 pdrs are from my wifes Guards armored division.  And so I marked them with 77.  For the anti tank regiment.


Once the decals were dry I brushed over them with gloss varnish to seal them good.  I used the vallejo gloss varnish.
The next step was the wash.  I like to do basically bathe my tanks in it.   Although I do dilute the wash with some water and a few drops of flow aid.  Flow Aid can be purchased at Michael's in North America or Im sure any artist or craft store.
After the wash its time to go over all the raised parts with a dry brushing of Russian Uniform and 25% Green grey to lighten it up.  Using white to lighten sometimes results in a lime color.  Be sure to pick out all the raised  details and corners/edges here.  I use a wider flat brush.
If the details dont seem to be popping enough add more Green grey and do another pass.

The next thing I did was add some rust pigment to the tracks.  I put a healthy amount on.  Later you can tone it down if you want.  These tanks probably wouldnt have had much time to rust yet but some would be apparent from their training in England Im sure.  

After the rust I went over the entire model with a light dry brush of Iraqui sand.  Hitting everything.  This further brings out the details and also simulates dry dust.

As mentioned I wanted to tone down the rust pigment on the tracks.  To do that you can dry brush Gunmetal along the tracks.  Or use the side of pencil.  
Once your happy with all the drybrushing its time to hit up all the details like shovels, tow cables and tarps etc.  For all the shovels I used Beige brown for handles, Black for the metal followed by a gunmetal drybrush.  You could skip the black and just use gunmetal though.  All the tarps I used Grey Green mixed with Khaki 50/50.  There are also some stowage crates that I painted Flat brown and then drybrushed with Beige brown.

Once all the details were done I hit them with a final coat of Matte Varnish.  All thats left is my crying when the wife rolls these out on me!
Oh and the 6 PDRs.  Just have to base them and the crew.


Thanks for looking.  And don't hesitate to ask about anything.  Im new at posting things up so Im sure I missed stuff.  :)

Monday, 5 March 2012

Random shots of some of my FoW minis.

While I wait for the varnish to dry on the AVREs I started messing around with the camera on my new Iphone.   I have to say it is a huge improvement from the Ipod.  Let me know what you think.
 Some Panther love.  These are all BF minis.

 StuG life