Every now and then I open up the drawer containing my friend Colin's american forces. He will from time to time play a game or two when he can, but mostly he just keeps tossing blisters at me to paint! I don't mind at all as I love the painting aspect of the hobby and it also gives me an american force that I can use anytime.
So last week after reading Devils Charge and listening to the WWPD podcast I was motivated to break open an armored rifle platoon. Steven and Luke of WWPD cant say enough good about them and I've had some great experiences playing the tank lists out of Blood Guts and Glory. (Easy8s rock) So off I went!
Step 1 was to clean up all the figs and arrange them temporarily on their bases. I do this to make sure Ive got enough dudes to properly fill out the platoon. I then mount them all on golf tees with a dab of glue before pushing the tees into a length of Styrofoam insulation.
Step 2 Is primer. I like Black and normally use the Games workshop chaos black primer. Its expensive but works well. I've experimented with a couple cheaper brands but haven't liked them at all.
While the primer dries I assembled the Halftracks. Making sure to add the winch to one of them to serve as the platoon command transport. The others all have rollers. I then prime them black as well.
Step 3 Drybrush time. (For all color choices I used this article on the FOW Site.) I use a ratty old brush for the initial coats. Using US Field Drab I add some paint to the brush and then dab it on a paper towel before doing all the Pants on all the figs. By the time I get through the whole platoon the first guys are already dry and I can add 25-30% white to the Fields drab and then lightly dry brush this over the pants to make them pop.
Step 4 More Dry brushing. This time its the jacket. Going Khaki. Same as step 3. (Dont forget to hit it again with 25% white. I don't worry about hitting stuff that isn't going to be khaki or field drab because I pick out all those details later with other colors. I do the anklets Khaki at the same time as well.
I take a break from the figures and head over to my card board box spray booth to give the half tracks a first light coat of American Armor spray paint. I do several light coats letting each dry before the next. Sometimes it can take 3-4 coats to get the proper coverage.
Step 5 Helmets. I paint these Brown violet and then do a 25% white dry brush over the top after.
Step 6 Webbing in Green Grey. This really doesn't stand out well against the Khaki at first. But once it dries it seems to work. I hit all the webbing, rifle slings, canteen and belts.
Step 7 Boots. Brown leather. Or flat brown.
Step 8 Rifle metal parts, SMGs and MGs I dry brush with gunmetal grey. They are primed black and look fine without going over them in more black.
Step 9 Faces with Medium flesh tone. And then a dry brush of flat flesh on the brow, nose, cheeks and chin.
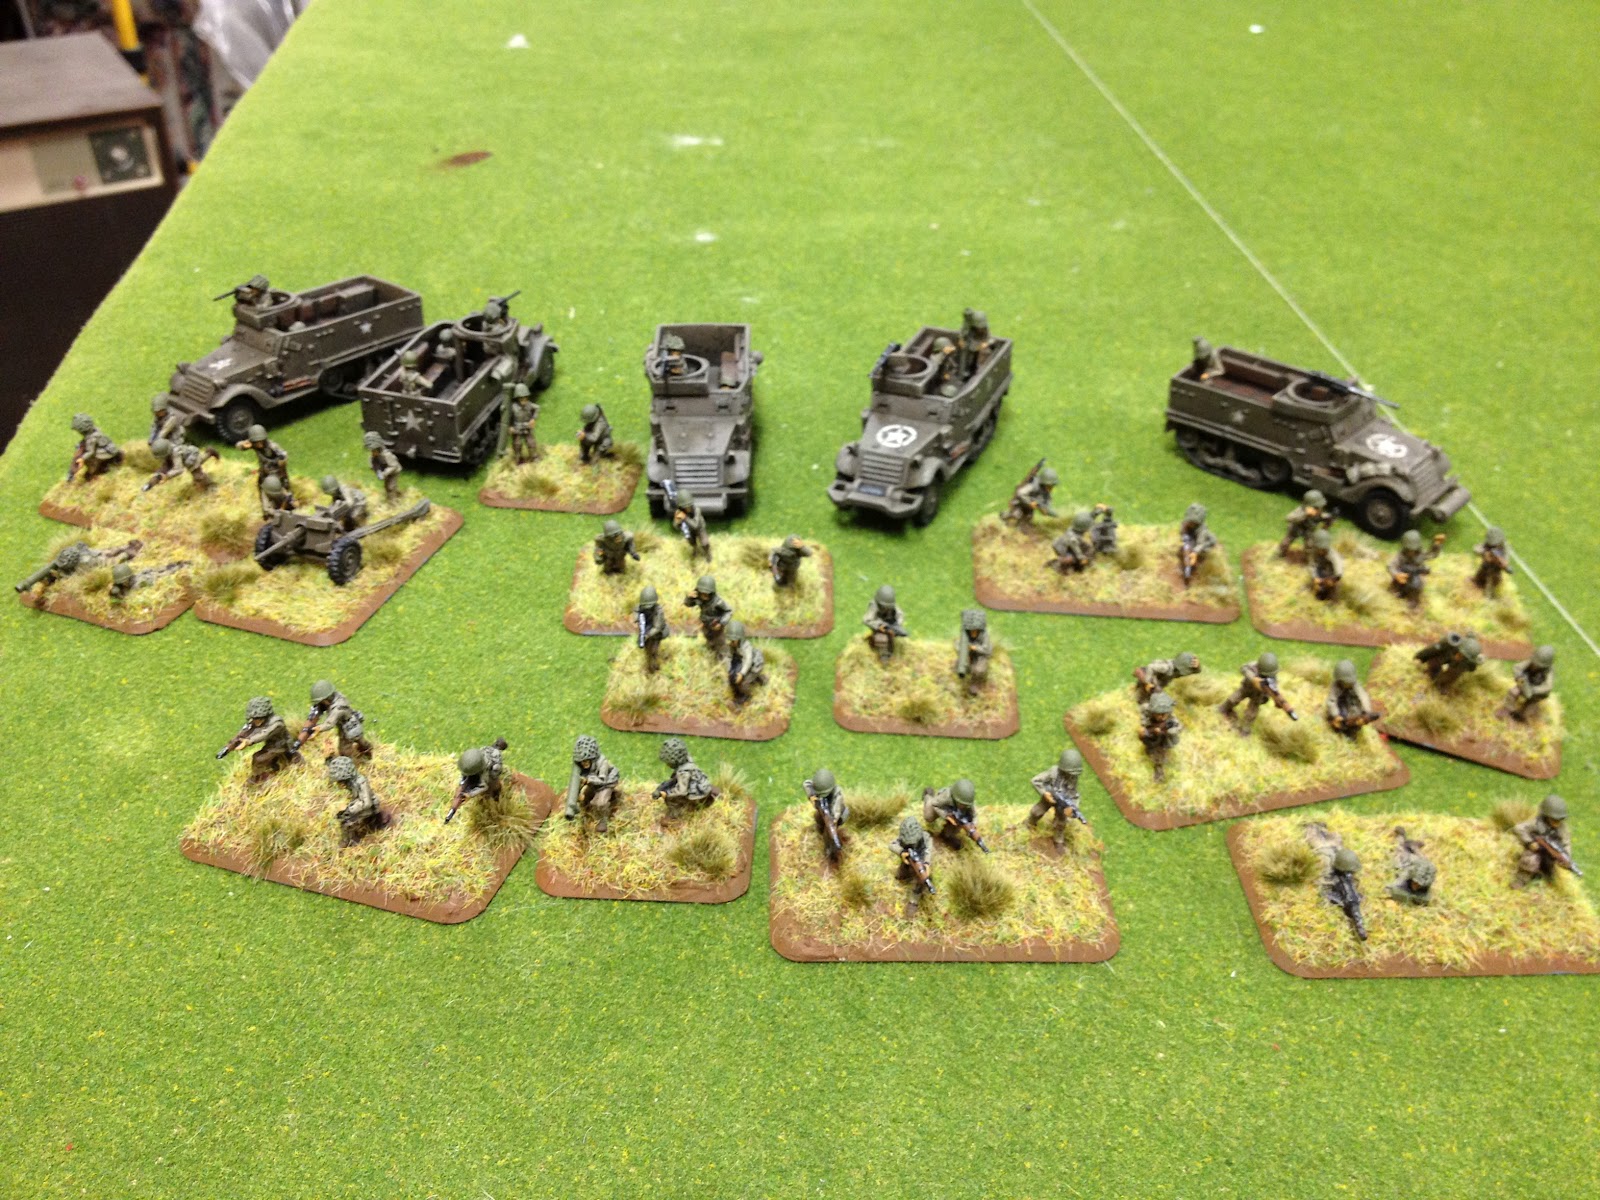
And that's pretty much it. I then paint the fig bases and glue them onto their battlefront medium and small bases.
Step 10 is drywall spackle time! Using a hobby sculpting tool that looks like something my dentist might have for scraping plaque. Or a miniature polearm. Pretty much looks exactly like a Glaive from my 2nd edition D&D arms and equipment guide. I build up the spackle to be level with the figure bases. Then It has to dry for 24 hours. Especially in a humid climate.
The Final Step for the figures is to paint the spackle. I used flat earth. Nothing fancy here. Just flat earth and then Static grass and Silfor tufts. Once thats all on and dry I hit it all with Testors Dullcote. Takes the shine off and seals them up protecting them.
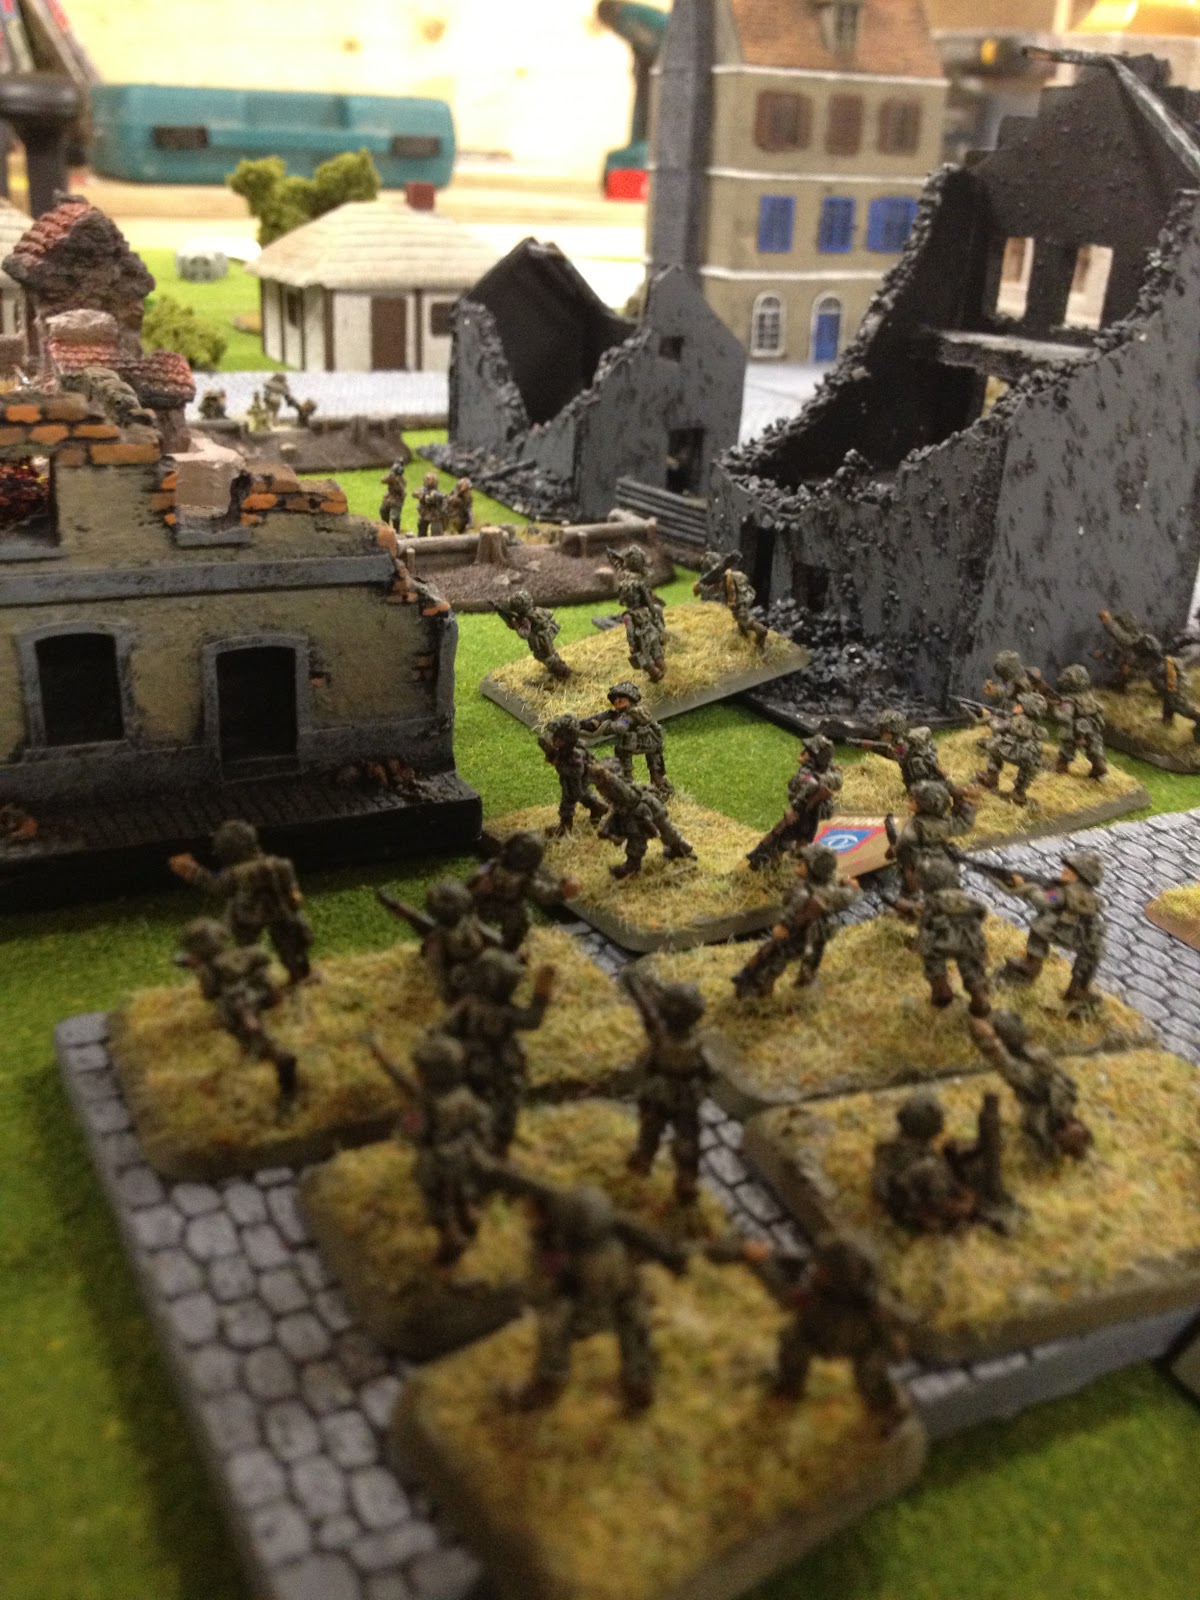
All done!
Monday, 23 July 2012
Sunday, 15 July 2012
Operation Sealion AAR#7
This was to be our last Sealion game. Both Sierra and I switched up our forces a bit. I had been having no luck with Fallschirmjager or CV Panzer Grens so I decided to fall back onto my very first FoW force. The 2nd SS.
Sierra really wanted to try out some Snipers so she let her Irish and Welsh Gaurds have some much needed rest and sent a British Rifle company to try and oust the 2nd SS from the outskirts of London.
The Mission was Fighting Withdrawal with British rolling up attacker. Being a city fight we played on a half table. Sierra opted for Night attack!
Summary:
6-1 Axis win
The 2nd SS manages to repel the British counter attack and thus give the other German Companies pulling out of London a better chance. Barkmann racks up some more kills before withdrawing with the others.
Sierra definetely had no luck this match. But she did learn that she hates MG teams. And that she loves her Guards. I doubt we will see her playing CT troops again.
Fearless Veteran | SS-Panzergrenadierkompanie (2. Das Reich) SS Motorised Infantry Company | German Late-War |
Platoon | Qty | Unit | Points | ||
Headquarters | |||||
| 2 2 1 2 1 | Cmd Panzerfaust SMG team Kfz 15 field car Motorcycle & Sidecar Panzerschreck team Sniper team | 190 | ||
Combat Platoons | |||||
| 1 6 | Cmd Panzerfaust SMG team MG team | 230 | ||
| 1 6 | Cmd Panzerfaust SMG team MG team | 230 | ||
| 1 4 1 1 2 1 | Cmd SMG team MG42 HMG Observer Rifle team Kubelwagen 8cm GW34 mortar 3-ton truck | 220 | ||
Divisional Support | |||||
| 1 | Oberscharführer Ernst Barkmann in Panther A | 275 | ||
| 1 1 1 3 | Cmd SMG team Observer Rifle team Kubelwagen 15cm NW41 | 105 | ||
Company Points: | 1250 |
www.EasyArmy.com | Source document: Earth & Steel (D-Day) |
Sierra really wanted to try out some Snipers so she let her Irish and Welsh Gaurds have some much needed rest and sent a British Rifle company to try and oust the 2nd SS from the outskirts of London.
Confident Trained | Rifle Company | British Late-War |
Platoon | Qty | Unit | Points | ||
Headquarters | |||||
| 2 2 | Cmd Rifle team Sniper team | 125 | ||
Combat Platoons | |||||
| 1 1 1 6 | Cmd Rifle/MG team PIAT team Light Mortar team Rifle/MG team | 140 | ||
| 1 1 1 6 | Cmd Rifle/MG team PIAT team Light Mortar team Rifle/MG team | 140 | ||
Weapons Platoons | |||||
| 1 2 2 4 | Cmd Rifle team Observer Rifle team PIAT team ML 3" Mk II Mortar | 120 | ||
| 1 1 6 6 | Cmd Rifle team Troop Carrier OQF 6 pdr gun Loyd Carrier | 150 | ||
| 2 1 | Universal Carrier with extra hull-mounted MG Universal Carrier with PIAT anti-tank projector | 85 | ||
Brigade Support | |||||
| 1 1 4 | Cmd Rifle team PIAT team Vickers HMG | 125 | ||
Divisional Support | |||||
| 1 1 9 1 | Cmd SMG team Bazooka team Rifle/MG team M2 60mm mortar | 355 | ||
Company Points: | 1240 |
www.EasyArmy.com | Source document: Flames of War v3 Forces |
The Mission was Fighting Withdrawal with British rolling up attacker. Being a city fight we played on a half table. Sierra opted for Night attack!
Shelled and abandoned the outskirts of London. Nighttime.
The 2nd SS are dug in and waiting. (German Left. Objective is the downed Plane)
The center. Main street. And Ammo dump objective.
German far Right. Disabled M10 objective and another MG platoon. Nebs ready to Rock. Shhhh Barkmann is in ambush...
Sierra's Home guard line up using cover of darkness to advance on the waiting Germans.
The 82nd Airborne is along for the ride. 6 Pdrs being towed up to range.
The British left with its Inf. and Carrier patrol.
The British advance but decide to fire into the darkness towards the germans. Scoring a hit and making firepower for the first kill of the night!
Barkmann makes his appearance on Mainstreet and blazes away at the towed 6 pdrs taking out one Loyd carrier and scaring off the rest of the transports forcing the guns to dismount under fire.
General British advance across the entire front. Risky! But darkness is concealing them for now.
German spotter in the Church tower calls in some Rockets on the 82nd.
No joy. The lone hit fails to kill and only succeeds in pinning.
The lone Panther commanded by Barkmann continues to eat away at the 6 Pdrs as they scrammble to get out of sight.
With a hail of MG fire Sierra's left flank gets pinned. No Casualties though luckily!
The luck was with the 2nd SS on the other flank though. Scoring 11 hits with 18 shots!
The result is devastating. The british are reduced to half strength.
Back on Sierra's left flank her infantry manage to unpin.
And along with her Carrier patrol they unleash enough fire to pin the opposing Panzer Grens!
The Grenadier fire back and hit 6 times! However the brits make all 6 saves!
The Airborne charge up the middle fragging an HMG in the nearby ruins as they go.
Turn 3 rolls around and the Sun comes up! (Popcorn bowl was the best we could do...)
The dawn breaking really spells doom for Sierra. Unable to get out of LOS or into cover Sierra's Rifles are torn up with MG fire. Even pinned the Grenadier spit nothing but death. Reducing the platoon to 1 team before it failed its morale check and ran. (Sierra really didnt like these trained non Guards guys)
The 82 assault up the middle but are pinned in defensive fire. They fall back. Taking no casualties though.
Panzer schreck fire wittles down the carrier patrol.
The 82nd switched back around the building and decides to go for Barkmann.
Sierra's mortar. While protected have limited fire arc due to the building.
Barkmann repels the 82nd with the help of some nearby MG teams!
Turn 4 and I have to remove a platoon. The Nebs withdraw.
With the retreat of the Brit Infantry on the German left the way is now open for a counter attack!
Sierra nails Barkmann with some smoke!
Left side Grenadier charge forth going for the assault vs the 6 pdrs.
Its turn 6 and Ive removed the center objective. Which was the only one close to the Airborne guys. And with them now really the only full strength combat platoon left and completely surrounded they Brits raise the white flag.
Summary:
6-1 Axis win
The 2nd SS manages to repel the British counter attack and thus give the other German Companies pulling out of London a better chance. Barkmann racks up some more kills before withdrawing with the others.
Sierra definetely had no luck this match. But she did learn that she hates MG teams. And that she loves her Guards. I doubt we will see her playing CT troops again.
Monday, 2 July 2012
Operation Sealion AAR#6
I had a couple friends over recently and we played a 3000 point teams match with each player fielding 1500pts and taking part in Operation Sea lion. Since my FJ company had been cut off and was either scattered, captured or killed I took command of a reliable old Panzer Gren Co. The Heavy platoon was split up into the two Grenadier platoons.
![]() ![]() | Panzergrenadierkompanie (Heer) Motorised Infantry Company | German Late-War |
Platoon | Qty | Unit | Points | ||
Headquarters | |||||
| 2 1 1 1 1 | Cmd Panzerfaust SMG team Kfz 15 field car Motorcycle & Sidecar Panzerschreck team Kfz 70 truck | 90 | ||
Combat Platoons | |||||
| 1 6 3 | Cmd Panzerfaust SMG team MG team Kfz 70 truck | 195 | ||
| 1 6 3 | Cmd Panzerfaust SMG team MG team Kfz 70 truck | 195 | ||
| 1 1 2 2 1 1 2 | Cmd SMG team Kfz 15 field car MG42 HMG Kfz 70 truck Observer Rifle team Kubelwagen 8cm GW34 mortar | 140 | ||
Weapons Platoon | |||||
| 1 2 | Cmd SMG team 7.5cm PaK40 gun | 105 | ||
| 2 | Sd Kfz 10/5 (2cm) | 60 | ||
Divisional Support | |||||
| 2 | Tiger I E | 430 | ||
| 3 | Sd Kfz 234/2 (Puma) | 150 | ||
| 5 | Limited Air Support Ju 87D Stuka | 135 | ||
Company Points: | 1500 |
My Team mate Daniel brought the steel. Fielding the 17th SS from the FoW briefings. Loaded to the brim with StuGs. Easy Army hasnt gotten to it yet so Ill list his company.
- HQ with 1 StuG (Fearless Vet)
- 3 Combat Platoons of 3X StuGs each (Fearless Vet)
- 6X Nebs (Confident Vet)
- 2X 8 Rads (Fearless Vet)
- 1 Grenadier Platoon (Confident Vet)
Our opponents brought a good mix too. The Brits sending their Welsh 2nd Household Cavalry into the fray yet again. Commanded by my lovely wife.
![]() ![]() | 2nd Household Cavalry Squadron (w/ Welsh) | British Late-War |
Platoon | Qty | Unit | Points | ||
Headquarters | |||||
| 2 | Staghound I | 110 | ||
Combat Platoons | |||||
| 2 1 | Daimler I Daimler Dingo | 125 | ||
| 2 1 | Daimler I Daimler Dingo | 125 | ||
Brigade Support | |||||
| 3 | Cromwell IV | 310 | ||
| 1 1 1 6 | Cmd Rifle/MG team PIAT team Light Mortar team Rifle/MG team | 185 | ||
| 1 1 1 6 | Cmd Rifle/MG team PIAT team Light Mortar team Rifle/MG team | 185 | ||
Divisional Support | |||||
| 2 1 1 2 1 1 4 4 | Cmd Rifle team Captured StuG Staff team 15 cwt truck Observer Rifle team OP Carrier OQF 25 pdr gun Quad tractor | 220 | ||
| 7 | Priority Air Support Typhoon | 220 | ||
| 1 | Auster AOP | 25 | ||
Company Points: | 1505 |
Her team mate Connor ran an American army that Ive been slowly assembling for another friend. He choose a Tank Company out of the new Blood Guts and Glory.
![]() ![]() | Tank Company (4th Division) | USA Late-War |
Platoon | Qty | Unit | Points | ||
Headquarters | |||||
| 2 2 | M4A3E8 Easy Eight Improvised Tank Armour | 305 | ||
Combat Platoons | |||||
| 3 1 1 5 | M4 or M4A1 Sherman M4A1 (76mm) Sherman M4A3E8 Easy Eight Improvised Tank Armour | 555 | ||
| 3 1 1 5 | M4 or M4A1 Sherman M4A1 (76mm) Sherman M4A3E8 Easy Eight Improvised Tank Armour | 555 | ||
Support Platoons | |||||
| 1 1 1 | M8 armored car Mortar Jeep Recon Jeep | 90 | ||
Company Points: | 1505 |
We rolled up the mission and got Breakthrough. Allies rolling up as attackers. Sierra sends in her Daimler/Dingo platoons and digs in her 25 pounders. Connor brings up a large Tank platoon and rushes up the road. Recon moves advance!
Across from the church where the Allies are pushing forward I set up a PaK line along the road. (The bocage here is just normal hedges.) Panzer Grens and one of Daniel's StuG platoons in support.
Diagonally from the Allies starting position is the objectives. Ive got a pair of Tigers gaurding the intersection backed up by another platoon of PGrens. This cobblestone road leads to London!
Daniel's Nebs dug in ready to rain fire.
The Allies push forward with Sierra sending all her Armored cars across the stream lead by her CO and 2IC in the Staghounds.
Smoke is dropped on the Pak 40s and Connor advances to close range.
Tigers are in position and making sure they have great firing lanes! Also being carefull of those Typhoons circling above. The Grens charge across to secure the objectives as quick as possible.
The Luftwaffe manages to take out a 25 pounder and pin the battery.
Connor lines up and lets the Pak 40s have it wiping out the whole platoon with a massive salvo from all his Shermans!
A pair of 10/5 AA vehicles arrive and set up around the crossroads. The Grenadiers are getting to the objectives!
Daniel's nebs and one of the Tigers cant seem to kill those Armored cars! However one Dingo is hit. Way to go now Sierra is mad...
Pay back time! Daniel races his StuGs up and engages Connor's Tank platoon. Grinding their advance to a halt.
The Grenadiers fail to dig in at the objectives and Typhoons swoop down on them.
Miraculously they only manage to pin.
Despite being under rocket bombardment and in the sights of a Tiger Sierra pushes forward MGs blazing away at another Gren platoon in range.
Daniel's 17th ss CO takes out a sherman 75 and 76 before taking a direct hit from the Easy 8 on the road.
Sierra lines up her Armored cars ready to pour the lead to the nearby Grenadiers.
And here come the Allied reserves! Straight into the assault!
But even pinned the MG teams with the 10/5 manage to stop the assault.
Determined to stop those seemingly invincible armored cars Daniel throws some StuG reserves at them. The Tiger keeps shooting at random birds in the sky...
The MGs unpin and let the brit rifles have it. Reducing them to a couple stands.
And then it happens.. Turn 6 Sierra and Connor roll 3 dice for reserves and get 3! Cromwells, Rifles and another American Tank platoon smash onto the scene. My Grens still cant dig in and are really starting to get worried! Daniel rushes some StuGs over.
The allies advance machine gunning the Grenadiers mercilessly.
One of the 10/5 goes up as a Cromwell blasts him off the bridge.
Tigers move to stem the tide!
The road to london is littered with burning tanks. Having run out of time the game is called. The Germans lost 1 platoon and the Allies none. So 2-1 for the Allies? If someone can help us confirm that by using the table on page 275 I would appreciate it. Its very confusing for ties.Summary
Area fought over: London (Outskirts)
Score: 2-1 (Draw in favor of Allies)
Subscribe to:
Posts (Atom)