After Securing the Beaches the allies continue to press inland. Are the Guards division armor ready to face the Panzers of the 2nd Panzer Division rushing to stop them?
The Forces:
Attackers
British Armoured Recce Squadron (Overlord pg. 82) (CT)
HQ with 2 Cromwells and a ARV.
2x Combat platoons of 3 Cromwells each
3 Stuart Recon tanks
2 M10s
1 Assault Platoon (CV)
1 Corps field battery of Royal Artillery.
Priority Air (Typhoons)
AOP
1450 Points
Defenders
PanzerKompanie (Atlantik Wall pg 102) (CV)
HQ with 2 Panzer IVs and SdKfz9 recovery
2x Combat platoons of 3 Panzer IVs each
Panzer Pioneer platoon
Schwere SS Panzer Platoon with 2 Tigers
Panzerspah patrol with SdKfz 250, and 2 SdKfz 250/9
Anti Aircraft Platoon with 2 Unarmored 10/5s
1500 Points
The Mission: Counter Attack
Le-Molay-Littry
The Defenders Objective is the wrecked M10 in the Wheat field. Top right on the hill is the Attackers Objective.

The 2nd Panzer Div has a platoon of Panzer pioneers dug in by the wrecked M10. The 2 Tigers and the 2IC are In ambush. Because of mobile reserves thats all that the Germans have at the start.

Bursting onto the scene from the direction of Gold beach comes the Confident Guards Column.
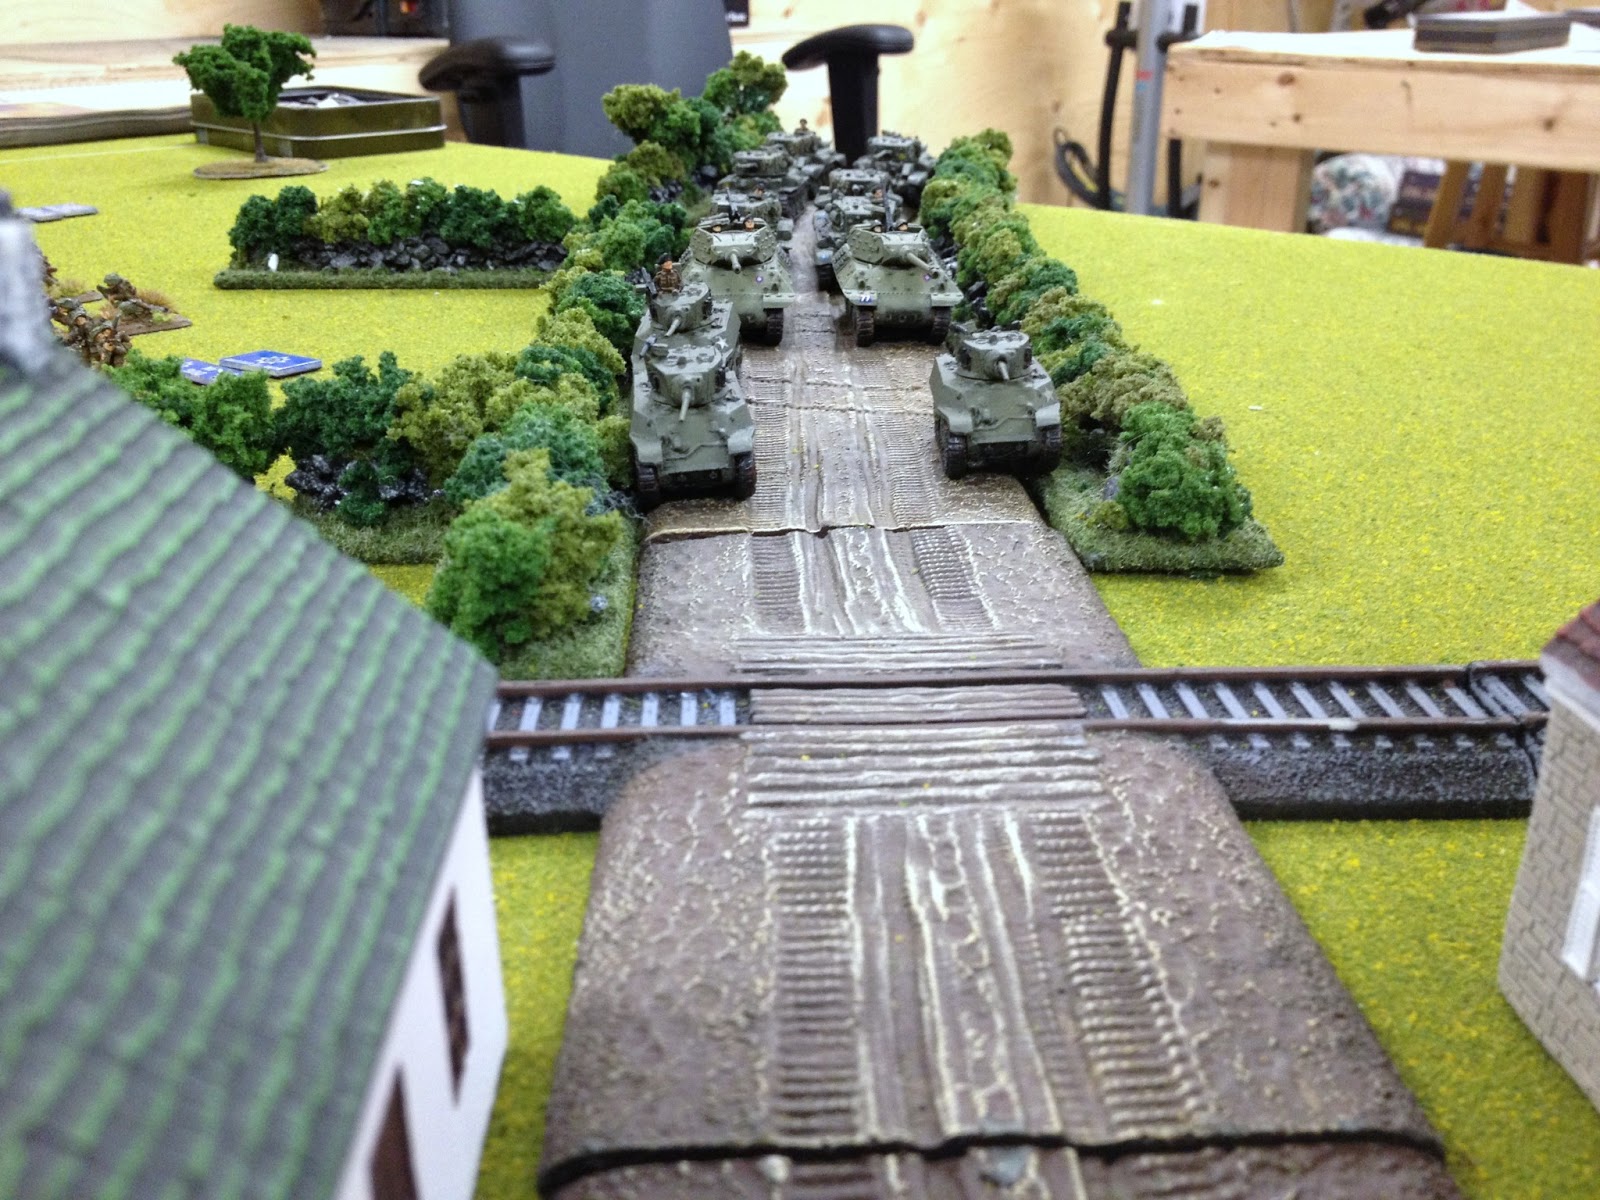
25 pdrs and the Assault troops flanking.

The Germans can only wait for them to come closer. The CO commands a good view of the road and country along the Advance in his Panzer IV

Stuarts race ahead using their recce move to bypass the village and head for the other objective.

And here comes the Typhoons. Not to worry though the CO is confident the Bocage will hide him enough to go unnoticed....

The dug in pioneers watch helplessly as the British AOP circles over head.

Sierra wastes no time and send her troops along with her CO and 2IC Cromwells racing towards the Objective.

The 25 pdrs range in with help from the AOP and the first shots are fired!

The Pioneers are pinned down in their foxholes.

Opps the Typhoon ranges in and even rerolling hits manages to take out the CO with a deadly barrage of rockets.

The Germans are quick to react and pounce on the Brits as they pass with their Tiger Ambush!

The Tigers exact revenge on the Brits by killing their CO and bailing an M10

Meanwhile the Brits split their forces into 2. One Platoon of Cromwells and the Stuarts aim for the Bridge while the other platoon with the Revovery vehicle make to cross the river at another point down stream.

In swoops the Air Force and takes out a defenceless Sdkfz 9. Poor guys.

The Stuarts are now within 20" of the objective on the hill! And unless the Germans get reserves on turn 2 its looking like a short fight.

But it was not meant to be. The reserves arrive and make straight for the attacking Stuarts

Shots are fired but the Stuarts skillfully disengage

And pull out of view making way for the Cromwells.

British troops manage to get to the Railway embankment and the 2IC crosses preparing to fire on the Grens in the field.

For a third time the Typhoons swoop in however this time the Panzers manage to avoid detection by staying tight to the Bocage.

The Tigers crash over the Bocage moving towards the remaining M10s and the Assault troops.

The Big guns face off

The ARV has its hands full as Sierras armor flounder in the rivers muddy banks.

The Tigers press forward machine gunning the British troops who took the time to dig in. Still casualties are inflicted.

And an M10 makes a mockery of a Tiger.

Over by the bridge the Panzer IV reserves take up cover positions at the Bocage and start lobbing shots at the Cromwells on the road. No kills.

With the weakened British troops infront of them and noone threatening the objective the Pioneers rally forward to assault.

The fight is bloody and back and forth but eventually the grenadiers prevail

They consolidate back to the Objective,

Only to be Congratulated by the Allied Air force! Rockets rain down around them but amazingly noone is killed.

Sierra's guns change tactics and move up to the Bocage!

These guys try again but all bog for a 2nd time! Go go Gadget ARV!

The Cromwells and the Stuarts form a firing line on the road hoping to break through the lone Panzer IV platoon.

The 2IC has crossed the river and is moving in on the objective from behind.

The 25 pounders unleash a devasting point blank volley and obliterate the german 2IC

The 2nd Panzer IV platoon arrives from reserves just in time to try and stop the Cromwells on the road.

Remaining Tiger moves through the debris field and starts to get into position to take out the 25 pounder battery

Stuarts are on the objective!

Having given up trying to cross the deep part of the River the other cromwells head for the where the 2IC is crossing at a shallow point. Long range shots manage to bail a PIV

Things are looking bad for the Germans

However everyone remounts and then turns their turrets to fire a desparate volly at the Stuarts. Which manages to take all three out! The Objective is safe for another turn.

German AA arrives

They take up position to shoot the AOP but whiff as the Pilot performs a loop D loop while making a rude gesture out the window.

The AOP undaunted by the Anti Air zooms in and radios for a bombardment. Which Claims a panzer IV!

A Side shot from a Cromwell finishes off another Panzer IV! The platoon breaks leaving noone close to the objective.

More reserves arrive but its too late. The British 2IC has unbogged and moved to contest. Now its about taking as many allies down as possible!

In a stunning display of targeting the German AA turns the AOP into confetti.

The Tiger finally gets into position on the other side and starts mopping up the 25pdr crew.

Nothing can stop the inevitable though and Sierra holds the objective uncontested at the start of her turn 7.

Allied Victory 4-3
Garrgh! Allied victory nullifies my Axis win in this sector.
ReplyDeleteVery cool battle report, and some exciting down to the wire stuff as well.
Haha ya I thought the same thing when I read yours!
DeleteNice AAR. Always nice to see some Cromwells in action.
ReplyDeleteBen
Awesome battle report! What colors did you use on the Cromwells? They look fantastic.
ReplyDeleteThat rude gesture was even a true story hehe.
ReplyDeleteThanks Tyler. The Cromwells are all primed with black then sprayed with the British Armor spray. (Which is basically Russian Uniform in the Vallejo line) I think give the whole tank a wash with thinned down black magic wash. After that I add white to my Russian Uniform 50/50 and dry brush all the edges and raised details. Finally a light drybrush of Iraqi Sand over the whole tank. Then Testors Dullcote.
ReplyDeleteGreat report, thanks for sharing.
ReplyDeleteCool Blog mate, link added
ReplyDeletewelcome and thank you!
ReplyDelete